Course Tour
Our 18-hole, par-72 layout is classically designed, winding its way behind a tertiary dune system. It features a number of spectacular elevated tees, fairways that are lined with tea trees and a number of tight driving holes.
The everyday golfer will find the experience of playing at Warrnambool Golf Club rewarding and invigorating because the layout is simply spectacular and a round, while challenging at times for the wayward player, is never unfair.
Hole One
Opening tee shot to uphill fairway which razor backs until 100m from green. Large flat surface guarded by two pot bunker.
Par 5 | Blue 445m | White 430m | Red 402m
Hole Two
Often played into prevailing winds, a long iron to driver required to reach green. Two bunkers protect flat green with large swale on the left-hand side of green collecting any wayward shots.
Par 3 | Blue 172m | White 164m | Red 150m
Hole Three
A challenging hole that demands an exacting drive over the hill. Right hand side is out of bounds with left side of fairway lined by trees. Shot into a sloping green with bunker on left hand side.
Par 4 | Blue 351m | White 348m | Red 343m
Hole Four
Short hole that demands accuracy. Large dune blocks right side with short second shot to raised green that has a slight fall back to fairway. Any shots long are protected by a large grassed mound but once over, players are punished by trees and scrub.
Par 4 | Blue 311m | White 289m | Red 253m
Hole Five
Magnificent sea views greet you but don’t be misled by your surrounds; any shot offline is likely to punish you. short in length, thick trees guard along the entire fairway with green sloping severely from back to front.
Par 4 | Blue 327m | White 317m | Red 313m
Hole Six
The final hole of the Shipwreck Bend stretch is a dogleg to the right. Tea tree along both sides of the fairway. Gentle uphill second, to tight and mounded green. Long and wayward are penalised.
Par 4 | Blue 345m | White 320m | Red 284m
Hole Seven
An elevated tee oversees a dogleg to the right.
The second shot is into a large green, guarded by bunkers right & left.
Par 4 | Blue 353m | White 344m | Red 346m
Hole Eight
A testing par 4, accuracy is demanded with the Tee shot. Green heavily treed & bunkered, requiring precision with a pitch. Flat putting surface.
Par 4 | Blue 240m | White 210m | Red 183m
Hole Nine
Up hill to big flat green, bunkers at front relatively straightforward.
Par 3 | Blue 133m | White 121m | Red 108m
Hole Ten
Usually attacking this hole into prevailing wind, tee shot is rather forgiving. A double kinked fairway surrounded by tea tree on both sides makes for demanding shots into the large raised green. The tiered green slopes heavily from back to front making putting very interesting especially if you are above the pin.
Par 5 | Blue 520m | White 502m | Red 449m
Hole Eleven
Equal longest par 4 on the course which usually plays downwind. Highly elevated tee on to a very generous fairway. An approach to a green which is 4m above the fairway makes for precision shot making. Putting surface runs from front to back.
Par 4 | Blue 385m | White 385m | Red 343m
Hole Twelve
A short and spacious par 4 driving hole. Bunker to the left and trees all around makes for a tough approach shot to a three-tiered green sloping away from left to right.
Par 4 | Blue 292m | White 282m | Red 262m
Hole Thirteen
The shortest hole on the course. The tee shot into a green which is situated 20m above the tee. Bunkers surround the front half of the green. The green slopes very heavily from back to front making putting challenging if you are above the pin. One of the toughest putting greens on the course. Got to be under the hole at all times.
Par 3 | Blue 117m | White 102m | Red 85m
Hole Fourteen
Equal longest par 4 on the course. A demanding drive onto a fairway which is lined by tea tree on both sides. The hole doglegs to the left at the 220m mark to a green which is highly elevated. Green slopes away on all sides, making approach shots very difficult. Must carry the ball on the green.
Par 4 | Blue 385m | White 368m | Red 343m
Hole Fifteen
Longer than you think. A tee shot into a green which slopes from left to right. Bunkers are on both sides of the green. High banking on the left-hand side of the green narrows down the landing area. Generally played with a left to right crosswind.
Par 3 | Blue 181m | White 172m | Red 149m
Hole Sixteen
Short par 4. Fairway lined on both side by tea tree. Accuracy off the tee is a must to set up a shot at the pin. Green is surrounded by bunkers. High sloping banks on the right make for a tight shot into right pin placements.
Par 4 | Blue 283m | White 276m | Red 270m
Hole Seventeen
A challenging par 5. The driving area has fairway bunkers on the left-hand side but is pretty wide. The fairway narrows off at the 400m mark where mounds on the left and bunkers to the right protect the green. A long raised green with a tier in the middle, which slopes from back to front makes putting very difficult and hard to judge.
Par 5 | Blue 488m | White 454m | Red 425m
Hole Eighteen
The tee is offset to the fairway which makes driving awkward. The landing area is wide but there is trouble down both sides of the fairway. The hole narrows as you get closer to the green, with cypresses on the left and a fairway bunker on the right. The green is surrounded by 3 bunkers and runs from back to front.
Par 5 | Blue 447m | White 431m | Red 393m
Daily Handicap Look-up Charts
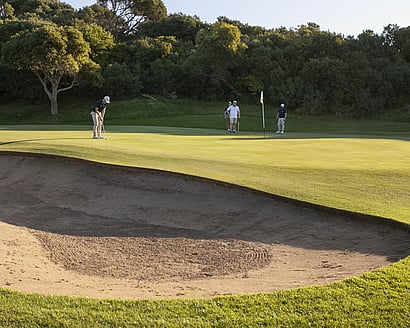
Conquer the Shipwreck Bend
The Shipwreck Bend is an iconic stretch of holes that encompasses holes 4, 5 and 6. These three challenging Par 4’s are a true test of your golfing skill as each has its own unique features that attempt to bring your round undone. So go ahead, challenge yourself, and don’t let your round run aground at the Shipwreck Bend.
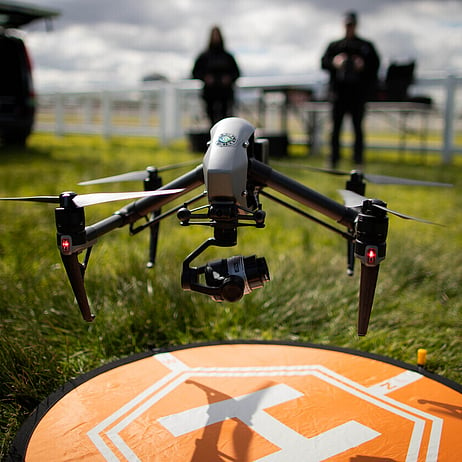
Aerial Vision
The hole-by-hole guides are brought to you by our club sponsors, Aerial Vision

Explore Warrnambool Golf Club
Green FeesA quality coastal golfing experience and year-round enjoyment, we welcome visitors and groups 7 days a week.
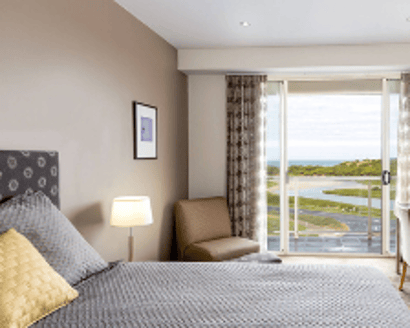
Stay & PlayBrowse our accommodation partners, book directly with them and save on accommodation and green fees.
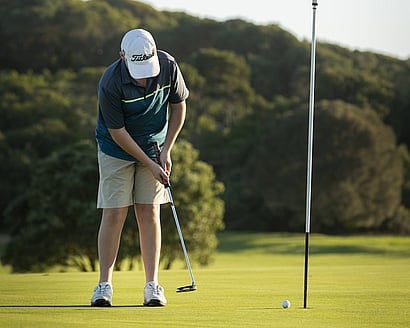
Dress & EtiquetteA fun, casual and relaxing round is what we aim for, to ensure that everyone on the course can enjoy their round of golf.